


OpenHarmony3.1 Release 发布之后各个群讨论激烈,个人也很想体验下,于是拿出快玩废掉的“HiSpark AI Camera”(主要是触摸屏玩坏了两个,手头剩下一个会闪的,再次吐槽下这个触摸屏,希望DAYU有改进哈)。
因为之前已经搭建好可以编译OpenHarmony3.0的Ubuntu20.04虚拟机环境,所以以下将在此基础上进行。
1、代码下载
我这边参考的是Gitee上OpenHarmony 3.1 Release 通过repo+ssh获取。
ssh的方式相对https方式下载会稳定些,下载指令如下:
repo init -u git@gitee.com:openharmony/manifest.git -b refs/tags/OpenHarmony-v3.1-Release --no-repo-verify
repo sync -c
repo forall -c 'git lfs pull'
./build/prebuilts_download.sh
2、代码编译
看了Gitee上的OpenHarmony文档 目前支持三种编译方式,如有理解错误请帮忙指正。
IDE编译方式,即使用DevEco Device Tool
这里我使用的是第三种build.sh编译方式 进入源码根目录执行如下指令
./build.sh --product-name Hi3516DV300
编译的这台电脑已经陪我工作8年了,所以比较慢,我是晚上睡前下的编译指令,然后然后第二天收获了一个error,在编译到剩下3000左右文件的时候报错了。关键报错信息如下
[OHOS ERROR] [442/3337] CC mingw_x86_64/obj/third_party/bounds_checking_function/src/libsec_static/memcpy_s.o
[OHOS ERROR] FAILED: mingw_x86_64/obj/third_party/bounds_checking_function/src/libsec_static/memcpy_s.o
[OHOS ERROR] /usr/bin/ccache ../../prebuilts/mingw-w64/ohos/linux-x86_64/clang-mingw/bin/clang -MMD -MF mingw_x86_64/obj/third_party/bounds_checking_function/src/libsec_static/memcpy_s.o.d -DV8_DEPRECATION_WARNINGS -D_FILE_OFFSET_BITS=64 -D_LARGEFILE_SOURCE -D_LARGEFILE64_SOURCE -D__STDC_CONSTANT_MACROS -D__STDC_FORMAT_MACROS -D_FORTIFY_SOURCE=2 -DCOMPONENT_BUILD -DNDEBUG -DNVALGRIND -DDYNAMIC_ANNOTATIONS_ENABLED=0 -Imingw_x86_64/override/third_party -I../.. -Imingw_x86_64/gen -I../../third_party/bounds_checking_function/include -D_INC_STRING_S -D_INC_WCHAR_S -D_SECIMP=// -D_STDIO_S_DEFINED -D_INC_STDIO_S -D_INC_STDLIB_S -D_INC_MEMORY_S -fno-strict-aliasing --param=ssp-buffer-size=4 -fno-stack-protector -Wno-builtin-macro-redefined -D__DATE__= -D__TIME__= -D__TIMESTAMP__= -funwind-tables -fcolor-diagnostics -fmerge-all-constants -Xclang -mllvm -Xclang -instcombine-lower-dbg-declare=0 -no-canonical-prefixes -target x86_64-pc-windows-gnu -rtlib=compiler-rt -stdlib=libc++ -lunwind -lpthread -Qunused-arguments -fuse-ld=lld -D__CUSTOM_SECURITY_LIBRARY -Wall -Werror -Wextra -Wimplicit-fallthrough -Wthread-safety -Wno-missing-field-initializers -Wno-unused-parameter -Wno-error=c99-designator -Wno-error=anon-enum-enum-conversion -Wno-error=implicit-fallthrough -Wno-error=sizeof-array-div -Wno-error=reorder-init-list -Wno-error=range-loop-construct -Wno-error=deprecated-copy -Wno-error=implicit-int-float-conversion -Wno-error=inconsistent-dllimport -Wno-error=unknown-warning-option -Wno-error=abstract-final-class -Wno-error=sign-compare -Wno-c++11-narrowing -Wno-unneeded-internal-declaration -Wno-error=c99-designator -Wno-error=anon-enum-enum-conversion -Wno-error=implicit-fallthrough -Wno-error=sizeof-array-div -Wno-error=reorder-init-list -Wno-error=range-loop-construct -Wno-error=deprecated-copy -Wno-error=implicit-int-float-conversion -Wno-error=inconsistent-dllimport -Wno-error=unknown-warning-option -Wno-error=abstract-final-class -Wno-error=sign-compare -Wno-error=int-in-bool-context -Wno-error=xor-used-as-pow -Wno-error=return-stack-address -Wno-error=dangling-gsl -Wno-undefined-var-template -Wno-nonportable-include-path -Wno-user-defined-warnings -Wno-unused-lambda-capture -Wno-null-pointer-arithmetic -Wno-enum-compare-switch -O2 -fno-ident -fdata-sections -ffunction-sections -fomit-frame-pointer -g2 -fno-common -Wheader-hygiene -Wstring-conversion -Wtautological-overlap-compare  -c ../../third_party/bounds_checking_function/src/memcpy_s.c -o mingw_x86_64/obj/third_party/bounds_checking_function/src/libsec_static/memcpy_s.o
[OHOS ERROR] ../../prebuilts/mingw-w64/ohos/linux-x86_64/clang-mingw/bin/clang: error while loading shared libraries: libtinfo.so.5: cannot open shared object file: No such file or directory
查了下缺少libtinfo.so.5的原因,最终通过以下方式安装libncurses5解决,有遇到相同问题的朋友可以试下
sudo apt-get install libncurses5
复制经过N个小时的编译最终编译成功,生成的结果镜像在out\hi3516dv300\packages\phone\images目录下
3、 使用HiTool.exe烧写
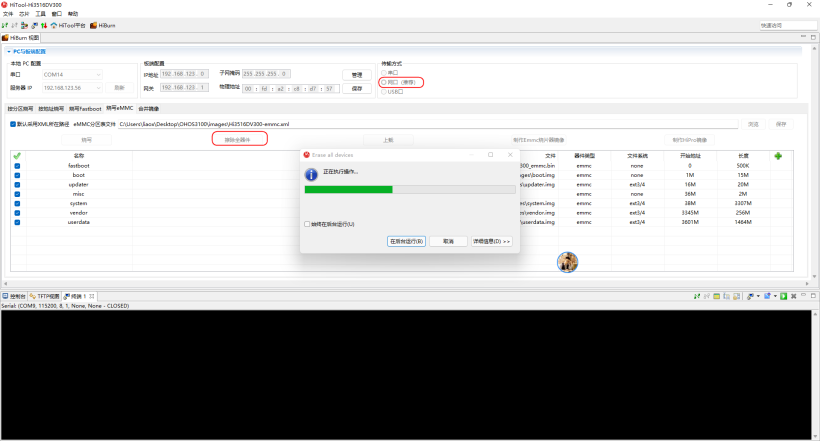
具体的烧写步骤可以论坛上找,这里主要想提醒下OpenHarmony3.1相比OpenHarmony3.0分区配置上有调整具体差异如下,为了避免未知的配置问题导致无法开机建议在“烧写”前先执行一次“擦除全器件”
OpenHarmony3.0的Hi3516DV300-emmc.xml文件:
<?xml version="1.0" encoding="GB2312" ?>
<Partition_Info>
<Part Sel="1" PartitionName="fastboot" FlashType="emmc" FileSystem="none" Start="0" Length="500K" SelectFile="Y:\Disk\code\Camera\out\target\product\Hi3559A\u-boot-hi3516dv300_emmc.bin"/>
<Part Sel="1" PartitionName="boot" FlashType="emmc" FileSystem="none" Start="1M" Length="15M" SelectFile="Y:\Disk\code\Camera\out\target\product\Hi3559A\uImage"/>
<Part Sel="1" PartitionName="updater" FlashType="emmc" FileSystem="ext3/4" Start="16M" Length="20M" SelectFile="Y:\Disk\code\Camera\out\target\product\Hi3559A\updater.img"/>
<Part Sel="0" PartitionName="misc" FlashType="emmc" FileSystem="none" Start="36M" Length="1M" SelectFile=""/>
<Part Sel="1" PartitionName="system" FlashType="emmc" FileSystem="ext3/4" Start="37M" Length="3307M" SelectFile="Y:\Disk\code\Camera\out\target\product\Hi3559A\system.img"/>
<Part Sel="1" PartitionName="vendor" FlashType="emmc" FileSystem="ext3/4" Start="3344M" Length="256M" SelectFile="Y:\Disk\code\Camera\out\target\product\Hi3559A\vendor.img"/>
<Part Sel="1" PartitionName="userdata" FlashType="emmc" FileSystem="ext3/4" Start="3600M" Length="1464M" SelectFile="Y:\Disk\code\Camera\out\target\product\Hi3559A\userdata.img"/>
</Partition_Info>
OpenHarmony3.1的Hi3516DV300-emmc.xml文件:
<?xml version="1.0" encoding="GB2312" ?>
<Partition_Info>
<Part Sel="1" PartitionName="fastboot" FlashType="emmc" FileSystem="none" Start="0" Length="500K" SelectFile="Y:\Disk\code\Camera\out\target\product\Hi3559A\u-boot-hi3516dv300_emmc.bin"/>
<Part Sel="1" PartitionName="boot" FlashType="emmc" FileSystem="none" Start="1M" Length="15M" SelectFile="Y:\Disk\code\Camera\out\target\product\Hi3559A\boot.img"/>
<Part Sel="1" PartitionName="updater" FlashType="emmc" FileSystem="ext3/4" Start="16M" Length="20M" SelectFile="Y:\Disk\code\Camera\out\target\product\Hi3559A\updater.img"/>
<Part Sel="1" PartitionName="misc" FlashType="emmc" FileSystem="none" Start="36M" Length="2M" SelectFile=""/>
<Part Sel="1" PartitionName="system" FlashType="emmc" FileSystem="ext3/4" Start="38M" Length="3307M" SelectFile="Y:\Disk\code\Camera\out\target\product\Hi3559A\system.img"/>
<Part Sel="1" PartitionName="vendor" FlashType="emmc" FileSystem="ext3/4" Start="3345M" Length="256M" SelectFile="Y:\Disk\code\Camera\out\target\product\Hi3559A\vendor.img"/>
<Part Sel="1" PartitionName="userdata" FlashType="emmc" FileSystem="ext3/4" Start="3601M" Length="1464M" SelectFile="Y:\Disk\code\Camera\out\target\product\Hi3559A\userdata.img"/>
</Partition_Info>
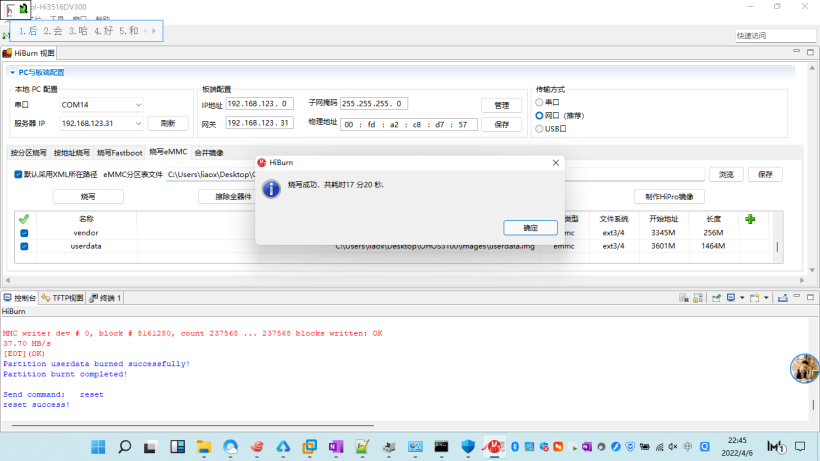
执行擦除全器件:
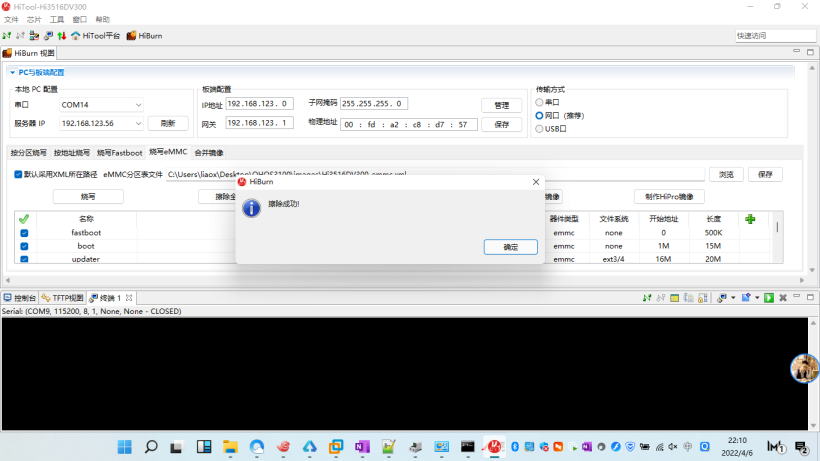
擦除全器件成功。
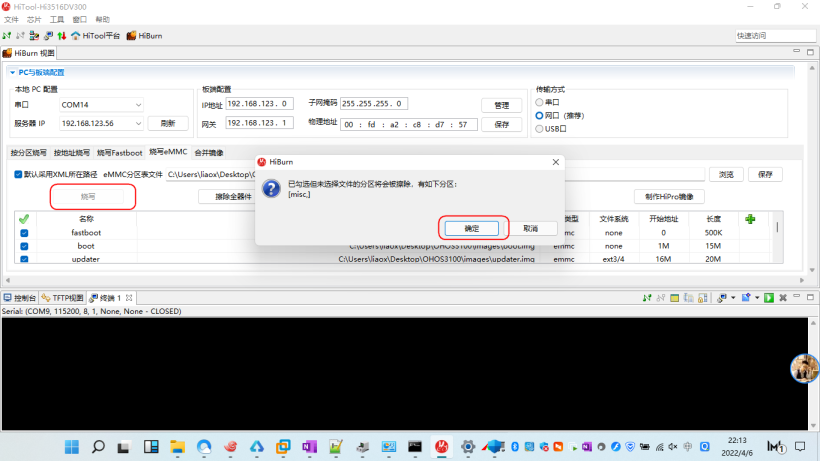
开始烧写会有如下提示“已勾选但未选择的分区将会被擦除…”点确定即可。
正常烧写中。
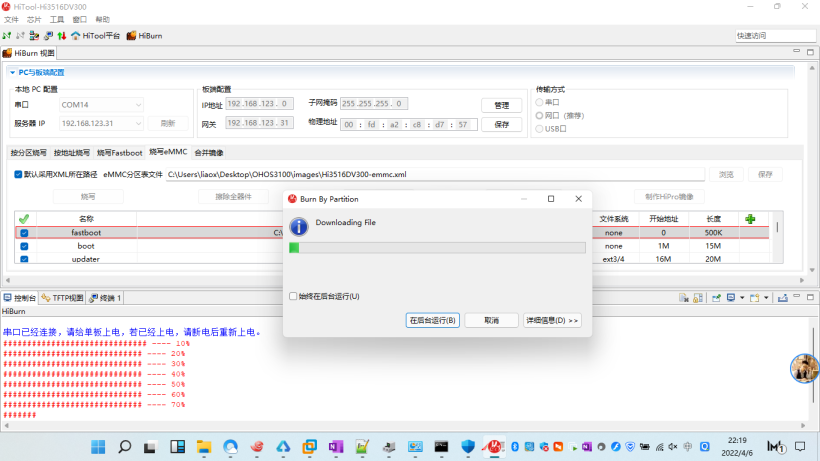
耗时17分20秒烧写完成。
4、 开机体验
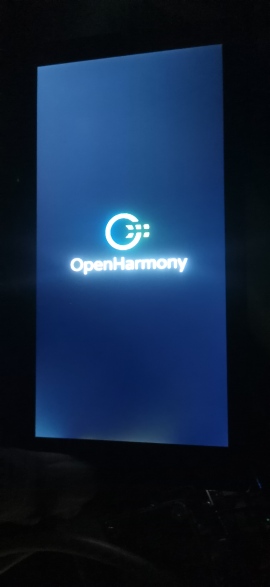
可以看到Openharmony的LOGO,然后听到开机音乐,接着会播放一个新的开机动画。总体的流畅度比3.0有些提升,但是仍然会卡。
(1) 开机动画
开机动画和3.0版本不一样,个人感觉3.0的会震撼些。
(2) 主页
相比3.0多了联系人、信息、备忘录,看起来更像手机了。

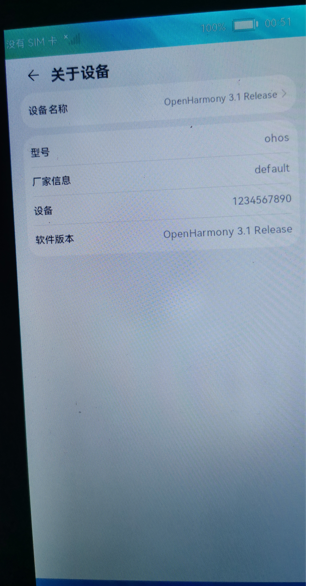
(3) 版本信息
版本信息是OpenHarmony3.1 Release。
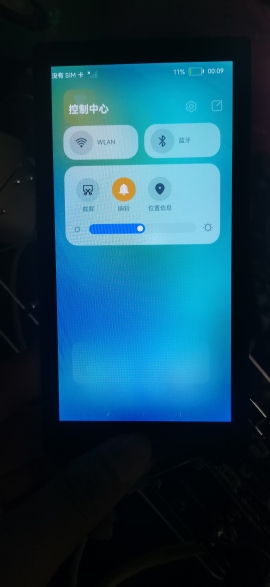
(4)右侧下拉控制中心
可以从右侧下拉控制中心来打开WIFI功能,尝试点击“截屏”但是没有成功。
以上对于OpenHarmony3.1 Release 版本的简单体验分享、附件是我编译出来的镜像档案。