


这是 LXD 2.0 系列介绍文章的第十篇。
介绍
Juju 是 Canonical 的服务建模和部署工具。 它支持非常广泛的云服务提供商,使您能够轻松地在任何云上部署任何您想要的服务。
此外,Juju 2.0 还支持 LXD,既适用于本地部署,也适合开发,并且可以在云实例或物理机上共同协作。
本篇文章将关注本地使用,通过一个没有任何Juju经验的LXD用户来体验。
要求
本篇文章假设你已经安装了 LXD 2.0 并且配置完毕(看前面的文章),并且是在 Ubuntu 16.04 LTS 上运行的。
设置 Juju
第一件事是在 Ubuntu 16.04 上安装 Juju 2.0。这个很简单:
- stgraber@dakara:~$ sudo apt install juju
- Reading package lists... Done
- Building dependency tree
- Reading state information... Done
- The following additional packages will be installed:
- juju-2.0
- Suggested packages:
- juju-core
- The following NEW packages will be installed:
- juju juju-2.0
- 0 upgraded, 2 newly installed, 0 to remove and 0 not upgraded.
- Need to get 39.7 MB of archives.
- After this operation, 269 MB of additional disk space will be used.
- Do you want to continue? [Y/n]
- Get:1 http://us.archive.ubuntu.com/ubuntu xenial-updates/main amd64 juju-2.0 amd64 2.0~beta7-0ubuntu1.16.04.1 [39.6 MB]
- Get:2 http://us.archive.ubuntu.com/ubuntu xenial-updates/main amd64 juju all 2.0~beta7-0ubuntu1.16.04.1 [9,556 B]
- Fetched 39.7 MB in 0s (53.4 MB/s)
- Selecting previously unselected package juju-2.0.
- (Reading database ... 255132 files and directories currently installed.)
- Preparing to unpack .../juju-2.0_2.0~beta7-0ubuntu1.16.04.1_amd64.deb ...
- Unpacking juju-2.0 (2.0~beta7-0ubuntu1.16.04.1) ...
- Selecting previously unselected package juju.
- Preparing to unpack .../juju_2.0~beta7-0ubuntu1.16.04.1_all.deb ...
- Unpacking juju (2.0~beta7-0ubuntu1.16.04.1) ...
- Processing triggers for man-db (2.7.5-1) ...
- Setting up juju-2.0 (2.0~beta7-0ubuntu1.16.04.1) ...
- Setting up juju (2.0~beta7-0ubuntu1.16.04.1) ...
安装完成后,我们可以使用 LXD 启动一个新的“控制器”。这意味着 Juju 不会修改你主机上的任何东西,它会在 LXD 容器中安装它的管理服务。
现在我们创建一个“test”控制器:
- stgraber@dakara:~$ juju bootstrap localhost test
- Creating Juju controller "local.test" on localhost/localhost
- Bootstrapping model "admin"
- Starting new instance for initial controller
- Launching instance
- - juju-745d1be3-e93d-41a2-80d4-fbe8714230dd-machine-0
- Installing Juju agent on bootstrap instance
- Preparing for Juju GUI 2.1.2 release installation
- Waiting for address
- Attempting to connect to 10.178.150.72:22
- Logging to /var/log/cloud-init-output.log on remote host
- Running apt-get update
- Running apt-get upgrade
- Installing package: curl
- Installing package: cpu-checker
- Installing package: bridge-utils
- Installing package: cloud-utils
- Installing package: cloud-image-utils
- Installing package: tmux
- Fetching tools: curl -sSfw 'tools from %{url_effective} downloaded: HTTP %{http_code}; time %{time_total}s; size %{size_download} bytes; speed %{speed_download} bytes/s ' --retry 10 -o $bin/tools.tar.gz <[https://streams.canonical.com/juju/tools/agent/2.0-beta7/juju-2.0-beta7-xenial-amd64.tgz]>
- Bootstrapping Juju machine agent
- Starting Juju machine agent (jujud-machine-0)
- Bootstrap agent installed
- Waiting for API to become available: upgrade in progress (upgrade in progress)
- Waiting for API to become available: upgrade in progress (upgrade in progress)
- Waiting for API to become available: upgrade in progress (upgrade in progress)
- Bootstrap complete, local.test now available.
这会花费一点时间,这时你可以看到一个正在运行的一个新的 LXD 容器:
- stgraber@dakara:~$ lxc list juju-
- +-----------------------------------------------------+---------+----------------------+------+------------+-----------+
- | NAME | STATE | IPV4 | IPV6 | TYPE | SNAPSHOTS |
- +-----------------------------------------------------+---------+----------------------+------+------------+-----------+
- | juju-745d1be3-e93d-41a2-80d4-fbe8714230dd-machine-0 | RUNNING | 10.178.150.72 (eth0) | | PERSISTENT | 0 |
- +-----------------------------------------------------+---------+----------------------+------+------------+-----------+
在 Juju 这边,你可以确认它是有响应的,并且还没有服务运行:
- stgraber@dakara:~$ juju status
- [Services]
- NAME STATUS EXPOSED CHARM
- [Units]
- ID WORKLOAD-STATUS JUJU-STATUS VERSION MACHINE PORTS PUBLIC-ADDRESS MESSAGE
- [Machines]
- ID STATE DNS INS-ID SERIES AZ
你也可以在浏览器中访问 Juju 的 GUI 界面:
- stgraber@dakara:~$ juju gui
- Opening the Juju GUI in your browser.
- If it does not open, open this URL:
- https://10.178.150.72:17070/gui/97fa390d-96ad-44df-8b59-e15fdcfc636b/
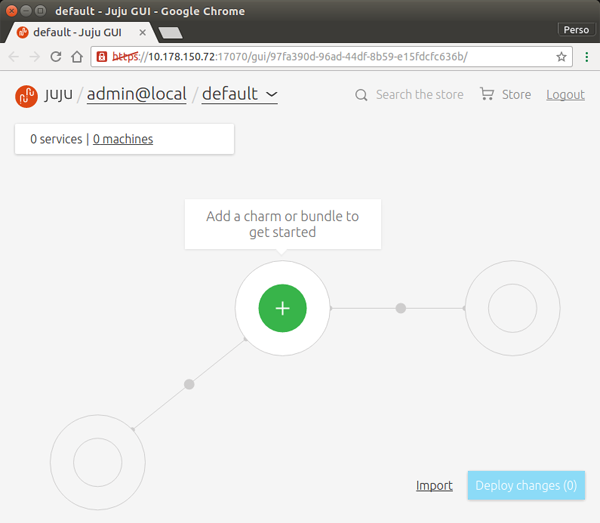
Juju web UI
不过我更倾向使用命令行,因此我会在接下来使用。
部署一个 minecraft 服务
让我们先来一个简单的,部署在一个容器中使用一个 Juju 单元的服务。
- stgraber@dakara:~$ juju deploy cs:trusty/minecraft
- Added charm "cs:trusty/minecraft-3" to the model.
- Deploying charm "cs:trusty/minecraft-3" with the charm series "trusty".
命令返回会很快,然而这不意味着服务已经启动并运行了。你应该使用 juju status 来查看:
- stgraber@dakara:~$ juju status
- [Services]
- NAME STATUS EXPOSED CHARM
- minecraft maintenance false cs:trusty/minecraft-3
- [Units]
- ID WORKLOAD-STATUS JUJU-STATUS VERSION MACHINE PORTS PUBLIC-ADDRESS MESSAGE
- minecraft/1 maintenance executing 2.0-beta7 1 10.178.150.74 (install) Installing java
- [Machines]
- ID STATE DNS INS-ID SERIES AZ
- 1 started 10.178.150.74 juju-97fa390d-96ad-44df-8b59-e15fdcfc636b-machine-1 trusty
我们可以看到它正在忙于在刚刚创建的 LXD 容器中安装 java。
- stgraber@dakara:~$ lxc list juju-
- +-----------------------------------------------------+---------+----------------------+------+------------+-----------+
- | NAME | STATE | IPV4 | IPV6 | TYPE | SNAPSHOTS |
- +-----------------------------------------------------+---------+----------------------+------+------------+-----------+
- | juju-745d1be3-e93d-41a2-80d4-fbe8714230dd-machine-0 | RUNNING | 10.178.150.72 (eth0) | | PERSISTENT | 0 |
- +-----------------------------------------------------+---------+----------------------+------+------------+-----------+
- | juju-97fa390d-96ad-44df-8b59-e15fdcfc636b-machine-1 | RUNNING | 10.178.150.74 (eth0) | | PERSISTENT | 0 |
- +-----------------------------------------------------+---------+----------------------+------+------------+-----------+
过一会之后,如我们所见服务就部署完毕了:
- stgraber@dakara:~$ juju status
- [Services]
- NAME STATUS EXPOSED CHARM
- minecraft active false cs:trusty/minecraft-3
- [Units]
- ID WORKLOAD-STATUS JUJU-STATUS VERSION MACHINE PORTS PUBLIC-ADDRESS MESSAGE
- minecraft/1 active idle 2.0-beta7 1 25565/tcp 10.178.150.74 Ready
- [Machines]
- ID STATE DNS INS-ID SERIES AZ
- 1 started 10.178.150.74 juju-97fa390d-96ad-44df-8b59-e15fdcfc636b-machine-1 trusty
这时你就可以启动你的 Minecraft 客户端了,将其指向 10.178.150.74,端口是 25565。现在可以在新的 minecraft 服务器上玩了!
当你不再需要它,只需运行:
- stgraber@dakara:~$ juju destroy-service minecraft
只要等待几秒就好了。
部署一个更复杂的 web 应用
Juju 的主要工作是建模复杂的服务,并以可扩展的方式部署它们。
为了更好地展示,让我们部署一个 Juju “组合”。 这个组合是由网站,API,数据库,静态 Web 服务器和反向代理组成的基本 Web 服务。
所以这将扩展到 4 个互联的 LXD 容器。
- stgraber@dakara:~$ juju deploy cs:~charmers/bundle/web-infrastructure-in-a-box
- added charm cs:~hp-discover/trusty/node-app-1
- service api deployed (charm cs:~hp-discover/trusty/node-app-1 with the series "trusty" defined by the bundle)
- annotations set for service api
- added charm cs:trusty/mongodb-3
- service mongodb deployed (charm cs:trusty/mongodb-3 with the series "trusty" defined by the bundle)
- annotations set for service mongodb
- added charm cs:~hp-discover/trusty/nginx-4
- service nginx deployed (charm cs:~hp-discover/trusty/nginx-4 with the series "trusty" defined by the bundle)
- annotations set for service nginx
- added charm cs:~hp-discover/trusty/nginx-proxy-3
- service nginx-proxy deployed (charm cs:~hp-discover/trusty/nginx-proxy-3 with the series "trusty" defined by the bundle)
- annotations set for service nginx-proxy
- added charm cs:~hp-discover/trusty/website-3
- service website deployed (charm cs:~hp-discover/trusty/website-3 with the series "trusty" defined by the bundle)
- annotations set for service website
- related mongodb:database and api:mongodb
- related website:nginx-engine and nginx:web-engine
- related api:website and nginx-proxy:website
- related nginx-proxy:website and website:website
- added api/0 unit to new machine
- added mongodb/0 unit to new machine
- added nginx/0 unit to new machine
- added nginx-proxy/0 unit to new machine
- deployment of bundle "cs:~charmers/bundle/web-infrastructure-in-a-box-10" completed
几秒后,你会看到 LXD 容器在运行了:
- stgraber@dakara:~$ lxc list juju-
- +-----------------------------------------------------+---------+-----------------------+------+------------+-----------+
- | NAME | STATE | IPV4 | IPV6 | TYPE | SNAPSHOTS |
- +-----------------------------------------------------+---------+-----------------------+------+------------+-----------+
- | juju-745d1be3-e93d-41a2-80d4-fbe8714230dd-machine-0 | RUNNING | 10.178.150.72 (eth0) | | PERSISTENT | 0 |
- +-----------------------------------------------------+---------+-----------------------+------+------------+-----------+
- | juju-97fa390d-96ad-44df-8b59-e15fdcfc636b-machine-2 | RUNNING | 10.178.150.98 (eth0) | | PERSISTENT | 0 |
- +-----------------------------------------------------+---------+-----------------------+------+------------+-----------+
- | juju-97fa390d-96ad-44df-8b59-e15fdcfc636b-machine-3 | RUNNING | 10.178.150.29 (eth0) | | PERSISTENT | 0 |
- +-----------------------------------------------------+---------+-----------------------+------+------------+-----------+
- | juju-97fa390d-96ad-44df-8b59-e15fdcfc636b-machine-4 | RUNNING | 10.178.150.202 (eth0) | | PERSISTENT | 0 |
- +-----------------------------------------------------+---------+-----------------------+------+------------+-----------+
- | juju-97fa390d-96ad-44df-8b59-e15fdcfc636b-machine-5 | RUNNING | 10.178.150.214 (eth0) | | PERSISTENT | 0 |
- +-----------------------------------------------------+---------+-----------------------+------+------------+-----------+
几分钟后,所有的服务应该部署完毕并运行了:
- stgraber@dakara:~$ juju status
- [Services]
- NAME STATUS EXPOSED CHARM
- api unknown false cs:~hp-discover/trusty/node-app-1
- mongodb unknown false cs:trusty/mongodb-3
- nginx unknown false cs:~hp-discover/trusty/nginx-4
- nginx-proxy unknown false cs:~hp-discover/trusty/nginx-proxy-3
- website false cs:~hp-discover/trusty/website-3
- [Relations]
- SERVICE1 SERVICE2 RELATION TYPE
- api mongodb database regular
- api nginx-proxy website regular
- mongodb mongodb replica-set peer
- nginx website nginx-engine subordinate
- nginx-proxy website website regular
- [Units]
- ID WORKLOAD-STATUS JUJU-STATUS VERSION MACHINE PORTS PUBLIC-ADDRESS MESSAGE
- api/0 unknown idle 2.0-beta7 2 8000/tcp 10.178.150.98
- mongodb/0 unknown idle 2.0-beta7 3 27017/tcp,27019/tcp,27021/tcp,28017/tcp 10.178.150.29
- nginx-proxy/0 unknown idle 2.0-beta7 5 80/tcp 10.178.150.214
- nginx/0 unknown idle 2.0-beta7 4 10.178.150.202
- website/0 unknown idle 2.0-beta7 10.178.150.202
- [Machines]
- ID STATE DNS INS-ID SERIES AZ
- 2 started 10.178.150.98 juju-97fa390d-96ad-44df-8b59-e15fdcfc636b-machine-2 trusty
- 3 started 10.178.150.29 juju-97fa390d-96ad-44df-8b59-e15fdcfc636b-machine-3 trusty
- 4 started 10.178.150.202 juju-97fa390d-96ad-44df-8b59-e15fdcfc636b-machine-4 trusty
- 5 started 10.178.150.214 juju-97fa390d-96ad-44df-8b59-e15fdcfc636b-machine-5 trusty
这时你就可以在 80 端口访问 http://10.178.150.214,并且会看到一个 Juju 学院页面。
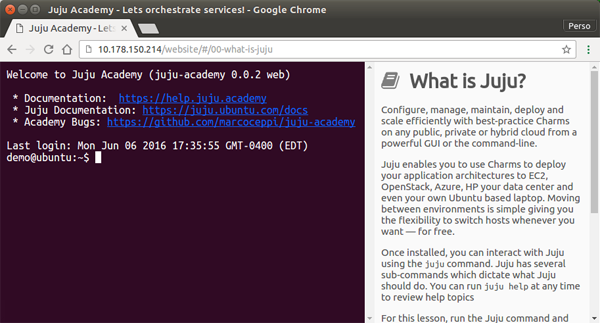
Juju Academy web service
清理所有东西
如果你不需要 Juju 创建的容器并且不在乎下次需要再次启动,最简单的方法是:
- stgraber@dakara:~$ juju destroy-controller test --destroy-all-models
- WARNING! This command will destroy the "local.test" controller.
- This includes all machines, services, data and other resources.
- Continue [y/N]? y
- Destroying controller
- Waiting for hosted model resources to be reclaimed
- Waiting on 1 model, 4 machines, 5 services
- Waiting on 1 model, 4 machines, 5 services
- Waiting on 1 model, 4 machines, 5 services
- Waiting on 1 model, 4 machines, 5 services
- Waiting on 1 model, 4 machines, 5 services
- Waiting on 1 model, 4 machines, 5 services
- Waiting on 1 model, 4 machines
- Waiting on 1 model, 4 machines
- Waiting on 1 model, 4 machines
- Waiting on 1 model, 4 machines
- Waiting on 1 model, 4 machines
- Waiting on 1 model, 4 machines
- Waiting on 1 model, 2 machines
- Waiting on 1 model
- Waiting on 1 model
- All hosted models reclaimed, cleaning up controller machines
我们用下面的方式确认:
- stgraber@dakara:~$ lxc list juju-
- +------+-------+------+------+------+-----------+
- | NAME | STATE | IPV4 | IPV6 | TYPE | SNAPSHOTS |
- +------+-------+------+------+------+-----------+
总结
Juju 2.0 内置的 LXD 支持使得可以用一种非常干净的方式来测试各种服务。
在 Juju charm store 中有很多预制的“组合”可以用来部署,甚至可以用多个“charm”来组合你想要的架构。
Juju 与 LXD 是一个完美的解决方案,从一个小的 Web 服务到大规模的基础设施都可以简单开发,这些都在你自己的机器上,并且不会在你的系统上造成混乱!
额外信息
Juju 网站: http://www.ubuntu.com/cloud/juju
Juju charm store : https://jujucharms.com
LXD 的主站在: https://linuxcontainers.org/lxd
LXD 的 GitHub 仓库: https://github.com/lxc/lxd
LXD 的邮件列表: https://lists.linuxcontainers.org
LXD 的 IRC 频道: #lxcontainers on irc.freenode.net
如果你不想或者不能在你的机器上安装 LXD ,你可以在 web 上试试在线版的 LXD。
作者简介:
我是 Stéphane Graber。我是 LXC 和 LXD 项目的领导者,目前在加拿大魁北克蒙特利尔的家所在的Canonical 有限公司担任 LXD 的技术主管。